Hello everyone I am sad to report the outdoor layout is no more, it was not due to it not working but due to unforeseen circumstances in my life that forced me to sell off and I am still selling off all my 2 rail O scale stuff. The locomotives have all gone to good homes and I am in the process of selling the rest of the stuff on evilbay. I am leaving this blog up so it may help others to try and build outdoors with smaller scale trains. I am not totally out of the game, I plan on going back to HO scale and maybe do the FreeMo thing or TOMA Modules when I get back on my feet, setting them up to use in the Great Outdoors, only time will tell.
I will still monitor this blog and if anyone has any questions on how I was building my layout outdoors drop me a line through this blog. As far as I know I will no longer be updating this blog except for answering questions.
2 Rail O Scale In The Great Outdoors Signing Off
Saturday, August 26, 2017
Thursday, May 4, 2017
Peco Track
Hello everyone I thought I was going to discuss my latest locomotive but change my mind because we have been discussing it over at the OGR forum Link here http://ogrforum.ogaugerr.com/topic/old-driver-identification-and-new-locomotive?reply=72383129404944097#72383129404944097
Anyway thought I would post a few pictures of my new track choice for replacing my Gargraves track, as you know in my previous post my furry brakeman was stepping on the rail and causing me some issues with my longer locomotives.
I am now in the process of taking up the Gargraves, I hate doing this because I will have to redo the top of roadbed, smooth it out before putting down the Peco track, at which I stated in an earlier post is my favorite track choice for outdoor use because of it's durability and price over Atlas, Atlas track is good but at over $18.00 for a section of flex, it is know wander newcomers have a hard time getting into the hobby unless they are very wealthy or have a very rich uncle.
I can get Peco for almost half the price. Just wish the Gargraves would have worked out, would have saved me a lot of money and aggravation. The good thing is I can still use the Gargraves when I build the layout into the shed for storage
I used Peco when I had my HO scale layout outdoors and for 2 years did not give me a bit of trouble.
Check out the pictures below.
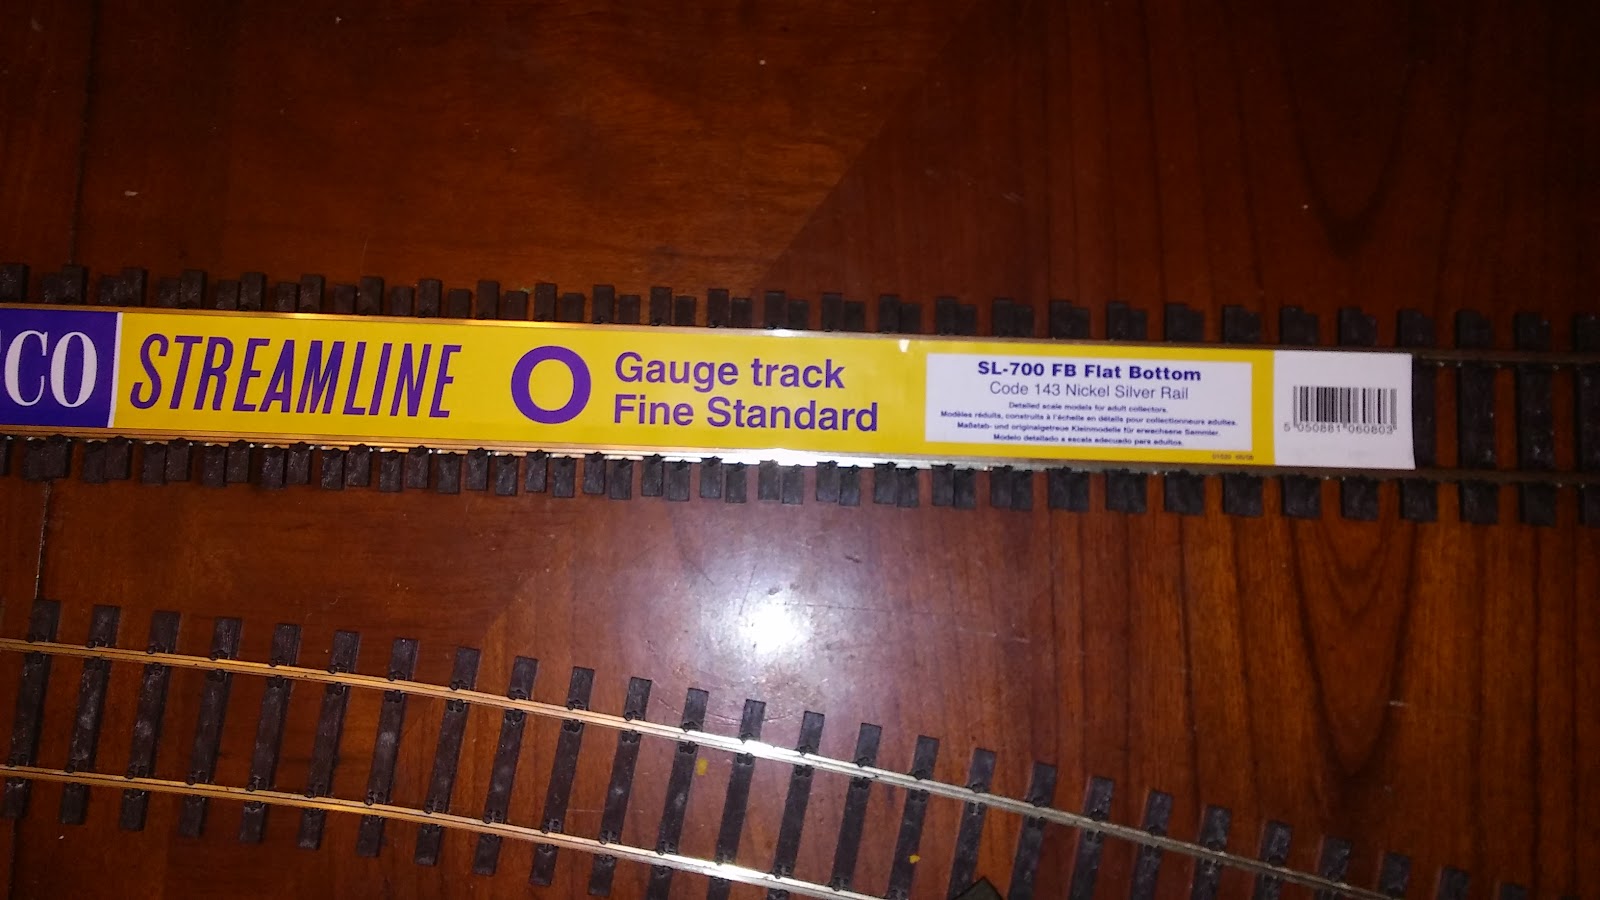 |
| Peco is code 143 so a bit smaller compared to Atlas Code 148, but I think if there is special sections I need that Atlas has, there should be no problem making it work with Peco. |
 |
| Here is a view of the track pre bent for the layout, tie spacing is a bit wide USA, but once ballasted should not be to noticeable. |
 |
| Here is the notice that the track is suitable for outdoor use |
 |
| Here is how I am going to do the buss wire. |
 |
| Here is the rail joiners, the little part that says conductive makes me laugh, of course they are conductive. |
 |
| The rail joiners come off the sprue with minimal effort unlike other rail joiners from a different manufacture that will remain nameless, especially their HO Joiners. Until Next Time. |
Saturday, April 22, 2017
Miscellanea and Photos
Hello everyone, I thought I would post some photos of the layout as I deconstruct the Gargraves track and start fitting the Peco Track in place, also a few photos of the reason I am having to go with Peco Track, my furry brakeman Trigger who as I listed in my last post was occasionally stepping on my track which was putting dips on the rail and causing issues with my longer wheelbase locomotives.


Next Post I will tell about my new locomotive acquisition and the Issues it has when compared to the prototype
Thursday, April 6, 2017
A Setback With Gargraves Track
Hello everyone sorry for the lack of recent posts, have not
had much time to work on the layout, even on my last vacation I did not really
have much time for the layout have been
busy with the family and domestic stuff.
Anyway I had somewhat of a setback on the layout, my being
cheap has caused me some trouble with using Gargraves track outdoors and it’s not
what you think, that its corrosion.
The problem is my German Shepherd, he sometimes steps on the
track and Gargraves being hollow will slightly bend even though it’s on solid
ballast.
The funny thing is I did not notice this with my little speeder or my
3450 class 4-6-4 Hudson, I noticed it when with great expectation I was going
to run my 2-10-4 on the layout, it ran great on the indoor test track but when I tried to run it
outdoors it only went a few feet and POP my 10 amp fuse blew, I searched for the cause and what I found was
with its much longer wheelbase the 2-10-4 s front pilot would dip down enough when the back half of the locomotive was above the area that dipped down and the front half would be at the bottom of the dip it caused a enough of a angle that
it would touch the rails which of course shorted things out.
Anyhow I have decided the best course of action will be to
change to a different brand of track and use the Gargraves for when I build the
indoor storage part of my build.
I have
decided to go with Peco code 143 track, so far I bought 4 pieces of their flex track.
I will have 5 days off from work starting next week so hopefully
this time I will be able to get some time to work on the layout and get the
Peco Track down for testing.
Until Next Time.
Wednesday, March 8, 2017
Looking Forward To Vacation Time
Hello all, not much to report at the moment, have not had much
time to work on the layout in the last week or so.
Did clean the leaves up around
the track and checked on my bushes I planted last fall alongside of the track,
all seem to have come through Winter just fine and have new buds, just hope we don’t have a hard
freeze between now and Spring.
I am taking some vacation
next week starting Wednesday through the following Monday, so I hope I will be
able to work some on hobby stuff and post here on any accomplishments I might have achieved.
What I want to do is run my 2-10-4 outdoors and see how
it does with its new can motor.
I also hope to realign
and ballast some of track I already have down and lay some more drainage pipe
road bed.
Stay Tuned
Sunday, February 26, 2017
Adapting A Lionel ZW 275 Watt AC Transformer To DC Power
Hello everyone I decided to make use of my old Lionel 275
watt ZW AC transformer and adapt it to use with my DC 2 rail trains until I can
decide what DCC system and decoders to use. Other people have done this and it’s
very easy to do. Below is a film of my engine running back and
forth on the Outdoor test track using the ZW plus some pictures of a wiring diagram and the buildup of the AC
to DC converter using a bridge rectifier.
Disclaimer:
This post is how I did it and is for entertainment use only.
I noticed I need to do some track realignment and some ballast work, but all in all everything seems to have made it through the winter fairly well. All I did was wiped the track down with a mixture of WD-40 and 91% rubbing alcohol, set the 3451 on the track and test ran it back and forth.
Disclaimer:
Doing electrical
work with these old transformers can be dangerous, proceed at your own risk.
I am not
responsible if you burn your house down, burn your layout to ashes, melt your favorite
train into a molten blob of metal or plastic goo,etc. etc. This post is how I did it and is for entertainment use only.
I noticed I need to do some track realignment and some ballast work, but all in all everything seems to have made it through the winter fairly well. All I did was wiped the track down with a mixture of WD-40 and 91% rubbing alcohol, set the 3451 on the track and test ran it back and forth.
 |
Here
is the Radio Shack 25 amp full-wave Bridge Rectifier glued to the inside bottom
of a plastic container.
|
 |
| Here is an overall view of the set up before wiring. (Please note the rocker switch on the lid was the wrong style of switch, I ended up replacing it with a DPDT toggle switch that I put on the lid in later photos, since I had already drilled the hole I just left the rocker switch in place rather than having a hole in the lid) |
 |
A
hole was drilled on front and back side for the wires to go through.
|
 |
| Here is wiring diagram I tried to draw up, |
 |
| Black wire on the common and the red wire on A |
 |
| Here is the wiring going from the transformer into the Bridge Rectifier |
 |
| Here is the wiring going to the DPDT Switch (Please note you are looking at the switch from the bottom instead of from the top like the drawing |
 |
| Here is another view of the wiring going to DPDT Switch. |
 |
| Here is an overhead view of the box which is how the wiring diagram is depicting. |
 |
| Here I am testing voltage on the layout next to the transformer I got a reading of 17.65 volts. |
 |
| I then went to the other end of the layout and it brought up a reading of 17.63 volts, not to bad considering that it's going through just track pins, none of the feeder wires and main buss wires are hooked up yet. I have to say I am very satisfied with the results, especially considering the track has been out in the elements since fall. |
I hope I wasn't to confusing.
Friday, February 24, 2017
Teaser Video Of The Adapting Of The Lionel ZW 275 Watt Transformer To DC Use
Sorry everyone I thought I was going to have more time to get my newest post on adapting my old Lionel 275 watt ZW Transformer to DC use done, but I have had some things come up and have not had time to get my new post together.
I should have it posted by Sunday at the latest. Anyway thought I would post a teaser video of the ZW powering my Brass Pecos River 3450 Class Santa Fe 4-6-4 Hudson.
I should have it posted by Sunday at the latest. Anyway thought I would post a teaser video of the ZW powering my Brass Pecos River 3450 Class Santa Fe 4-6-4 Hudson.
Subscribe to:
Posts (Atom)